Do you want to learn how to collect phone numbers with popups on your website?
With a well-designed popup, you can offer an incentive for website visitors to sign up for promotional texts from you. Then, you’ll have a strong SMS list to promote your sales, new products, and other offers.
By the end of this article, you’ll learn exactly how to use popups to get mobile phone numbers for your SMS marketing campaigns.
Why Should You Collect Phone Numbers on Your Website?
The #1 reason you should collect phone numbers on your website is to engage in SMS marketing. SMS marketing is a strategy that allows businesses to send messages to customers via text. Businesses can send text messages to prospects and customers to increase brand awareness, boost engagement, and generate sales.
If you’re new to SMS marketing or want to improve your strategy, check out our guide below!
If you want a successful SMS marketing strategy, you need to build an SMS list full of engaged leads.
OptinMonster is the best lead generation tool for your website. Whether you want to collect phone numbers or build an email list, OptinMonster makes it easy to do so.
You can use our popups, floating bars, and other onsite campaigns to offer enticing incentives in exchange for visitors’ phone numbers or email addresses.

OptinMonster includes tons of different targeting options, so you can personalize your offer based on the user’s intent, the source traffic, geographical location, and so on.
Using OptinMonster, Biddyco tripled their conversions in just 30 days!
And it’s just so easy to use. You can create stunning popups in minutes, without any coding or design experience.
Now, we’ll build a popup in OptinMonster that collects phone numbers on your website.
Before I dive into my step-by-step instructions, here’s a video overview of the process:
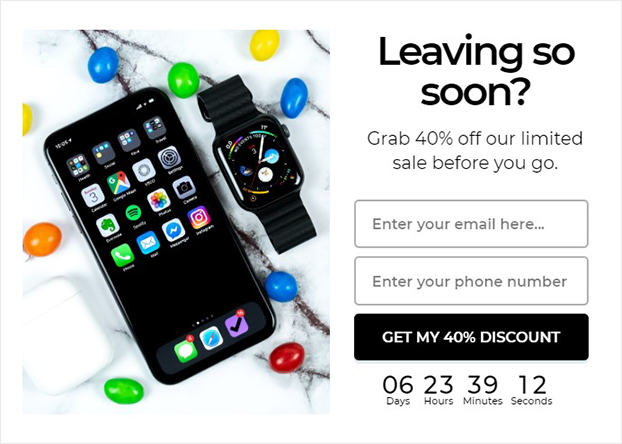
Today, we’re going to create this campaign to show you how to collect phone numbers with a popup:
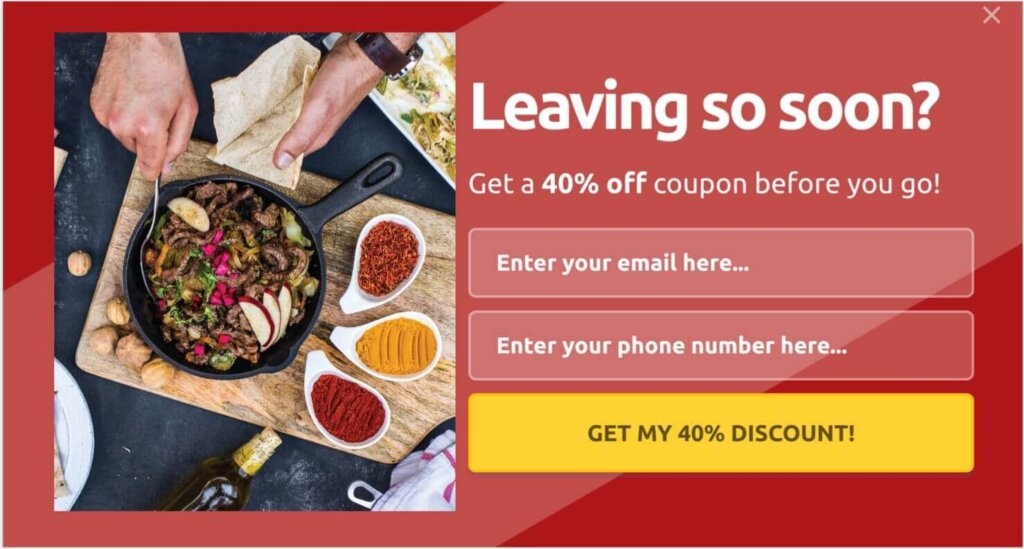

We’ll build our popup based on these popup best practices:
Let’s get started.
Step 1: Create a Campaign to Collect Phone Numbers
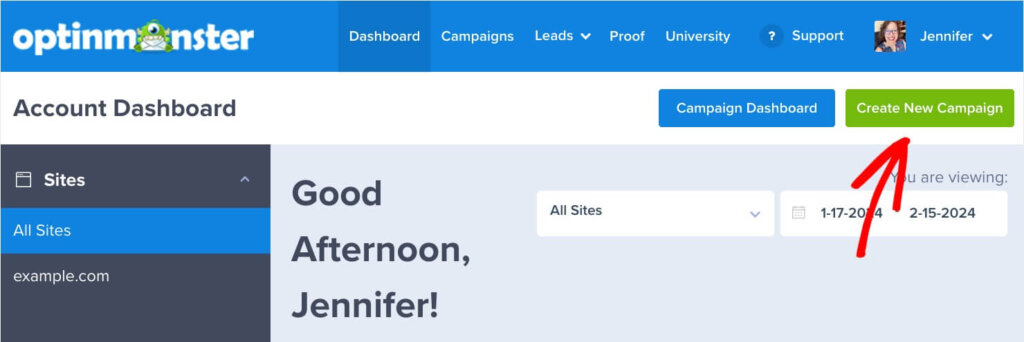
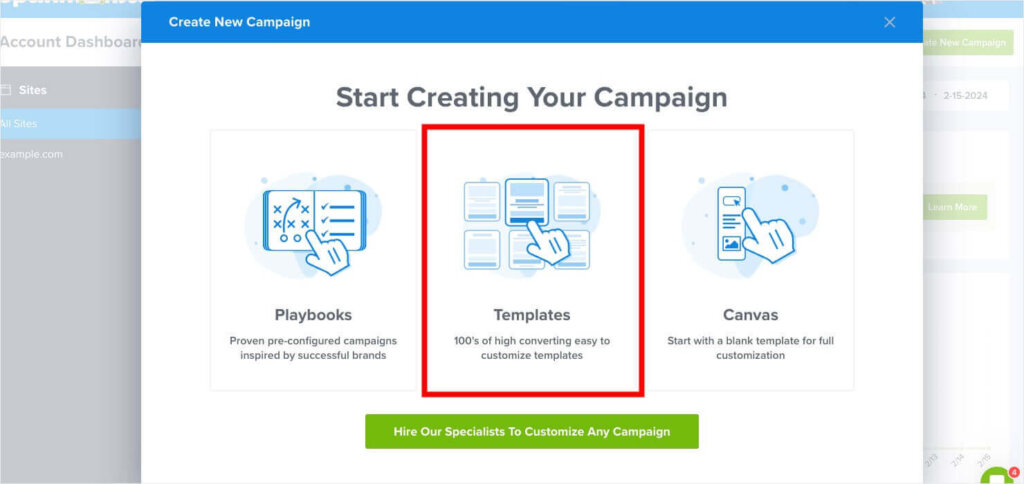
After you’ve signed up for OptinMonster, log into your OptinMonster dashboard and choose Create New Campaign.

With OptinMonster’s 700+ pre-built templates, there’s no need to design a popup from scratch. So in the Create New Campaign box, I’m going to click Templates.

I’ll make sure the templates are filtered by the Popup campaign type, which should be the default. You’ll see a search box where you can search for particular types of templates.
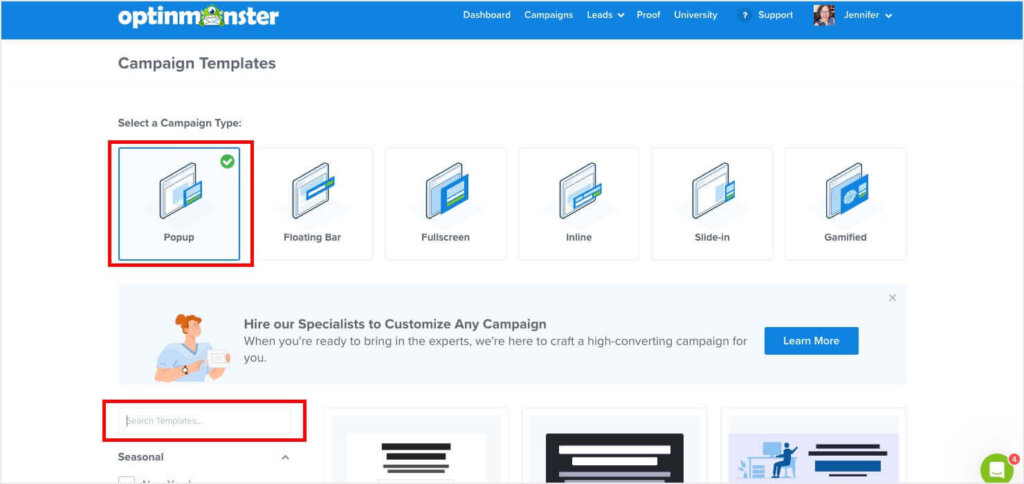

There are lots of ways to filter and search through our templates based on type, season/holiday, goal, and more. I know the exact template I want to use for my phone number popup, so I’ll search for Tech Discount and then click Use Template on the search result of the same name.


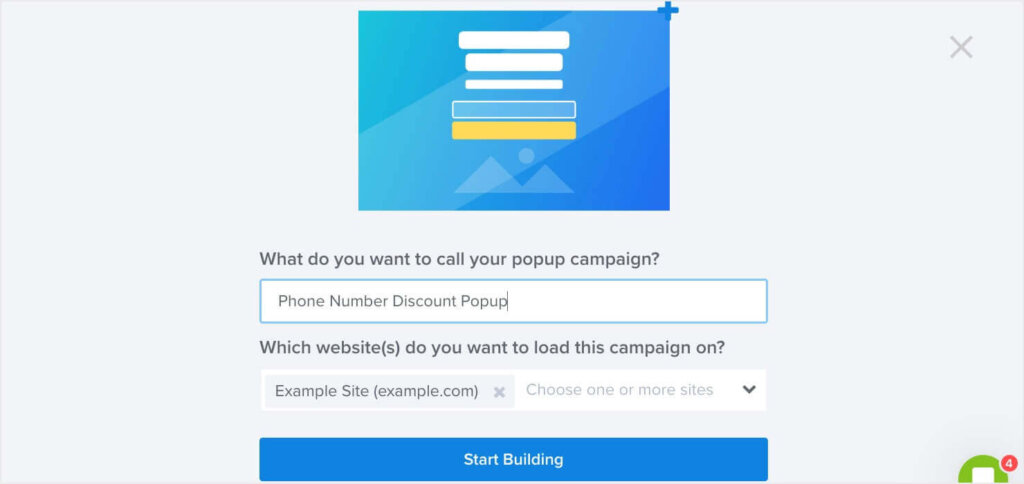
After selecting the template, I’ll give my new campaign a name and click Start Building

Step 2: Design a Popup to Collect Phone Numbers
Now, you’ll be in the campaign builder, where you can customize your popup. The Tech Discount template has space for an image, an attention-grabbing headline, and our offer. As you’ll see in a moment, we’ll be able to add a phone number field in seconds.
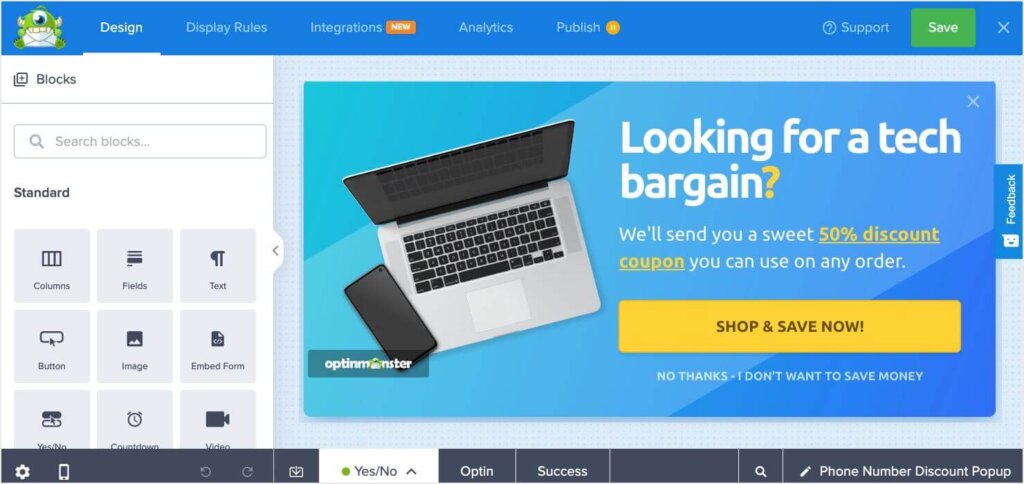

In our drag-and-drop builder, you have absolute freedom to customize the design. These options give you the power to create popups that reflect your brand and speak to your customers.
That said, we won’t go into too much detail about customizing every aspect of your campaign. There are too many options to cover in just one post.
If you’re just getting started with OptinMonster, check out this guide on how to create and design your first OptinMonster campaign.
For today’s tutorial, you only need to know the basic principles of customizing your template.
By default, many of our templates are 2-step optins that start with a Yes/No view. There are many benefits to 2-step optins. However, I want the popup I’m creating today to immediately show the text fields for entering an email address and phone number.
To do that, click the arrow by the Yes/No tab at the bottom of the page and click Disable Yes/No View.


Then click the Optin tab at the bottom to start editing.
OptinMonster campaigns are built with design elements called blocks. To change an element, all you need to do is click on the block in your editor. Then, you’ll see the editing tools appear on the left side of the editor.
If you want to change the image, click on the image in the campaign, and you’ll see the image settings in the editing panel on the left:
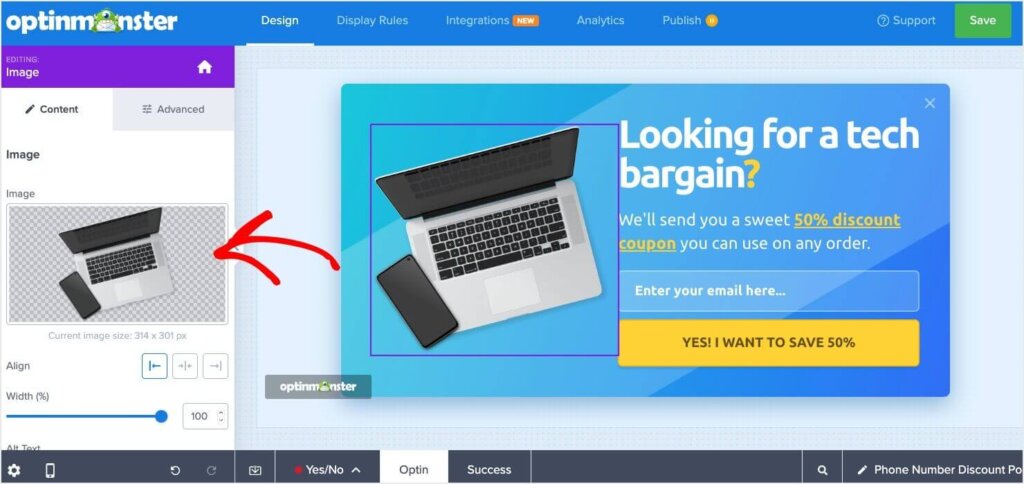

Click on the image in the left panel to upload any image you’d like to replace it. You can also search our Unsplash integration to find stock images to use.
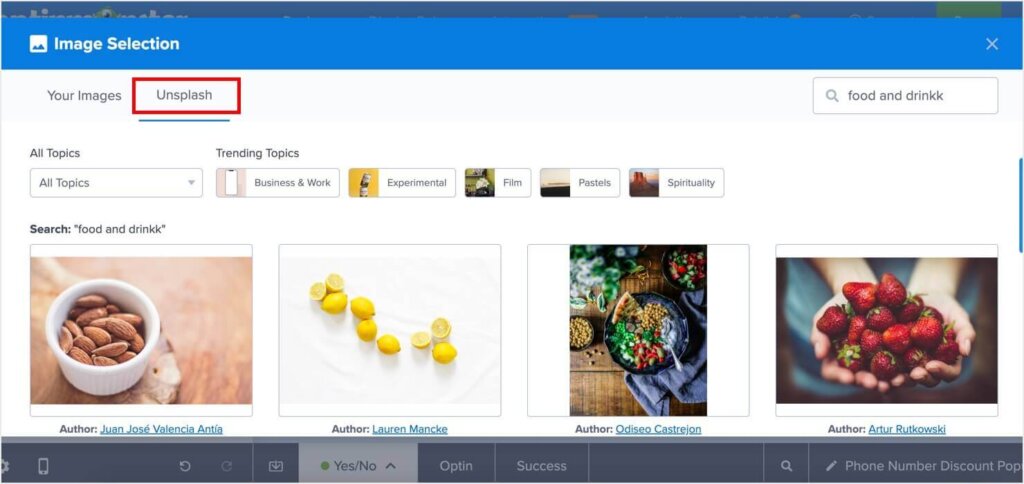

Once you’ve selected the image you want, it will now show up in your campaign.
Editing text is even easier. When you click into a text box, you can change the text within the box itself. Highlight some text, and a formatting toolbar will also display.
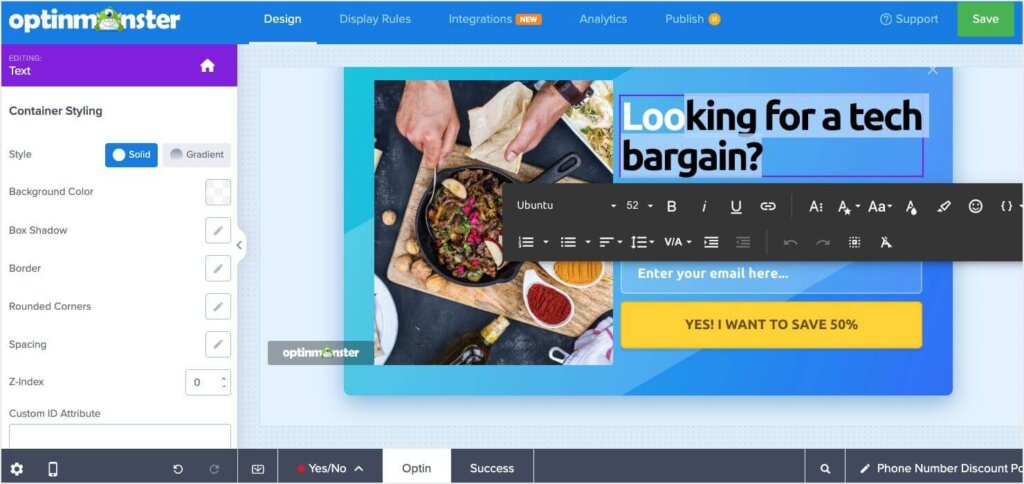

After changing the image and text, I’m going to add a phone number field.
Click on the email field in the campaign to open the field settings in the left panel.
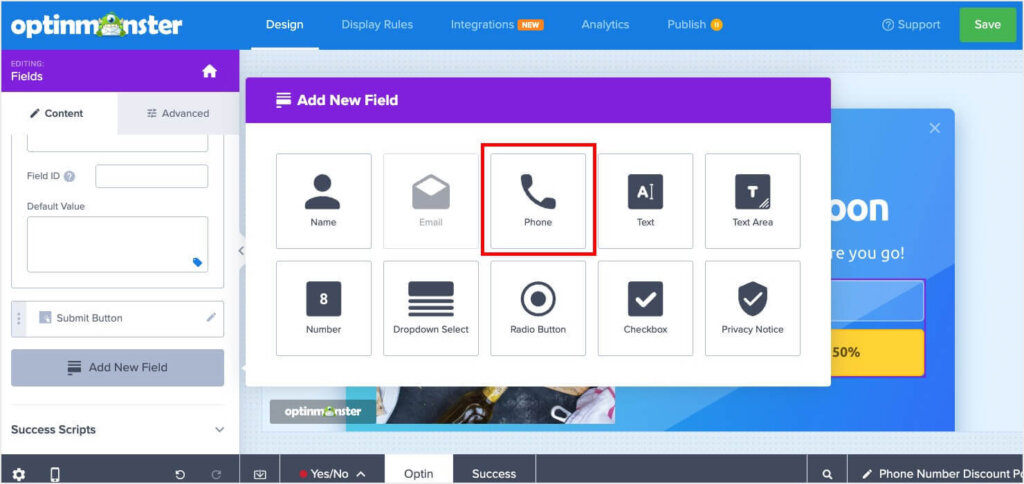
Scroll down and click Add New Field.
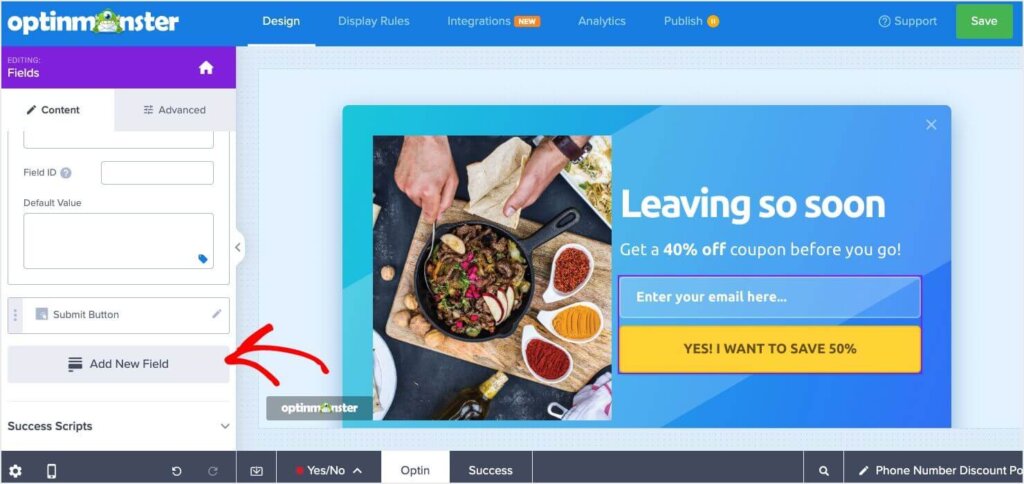

In the Add New Field window, select Phone to add a phone number field to your popup campaign.

Now, I’ll change the text in the button. With the email and phone number field box still selected, scroll down in the left panel until you see Submit Button. Click the pencil icon to expand your options. Change the text in the Button Text field.
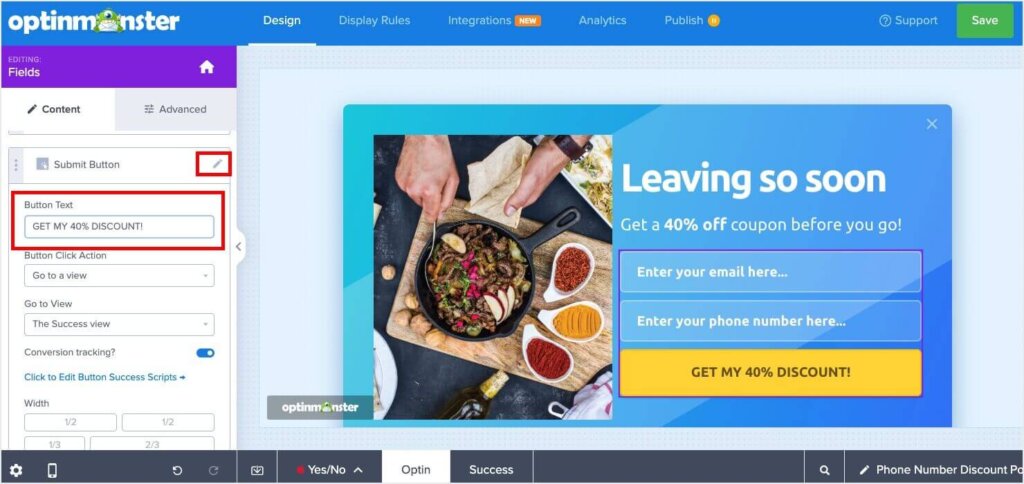

Note: I’m leaving the button color as-is, but you can change it under the Advanced tab.
Let’s change the background color of our popup so it looks better with the photo we’ve chosen. Click the background of your popup campaign, and you’ll see View Styling settings in the left panel.
Change the style from Gradient to Solid. Then, click the color square beside Background Color to change the color.
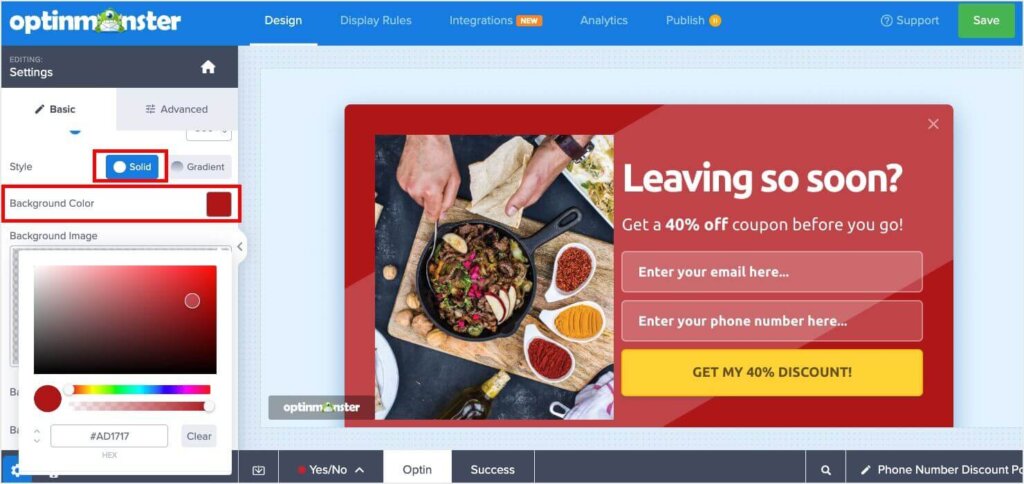

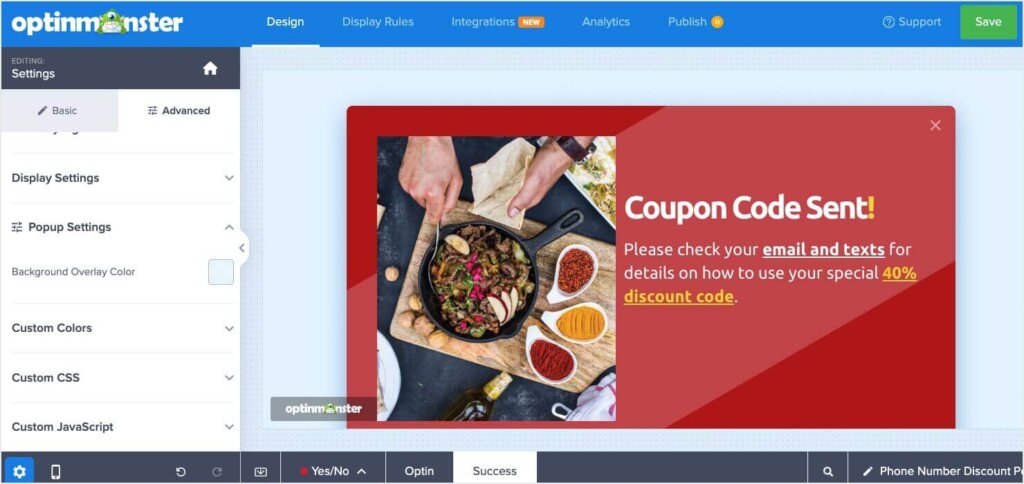
Now, the Optin view of your popup is ready to go! We’ll just need to take a moment to edit the Success View. That’s what your visitors will see after they submit their email address and phone number.
Click the Success tab at the bottom of the screen to view the Success View.
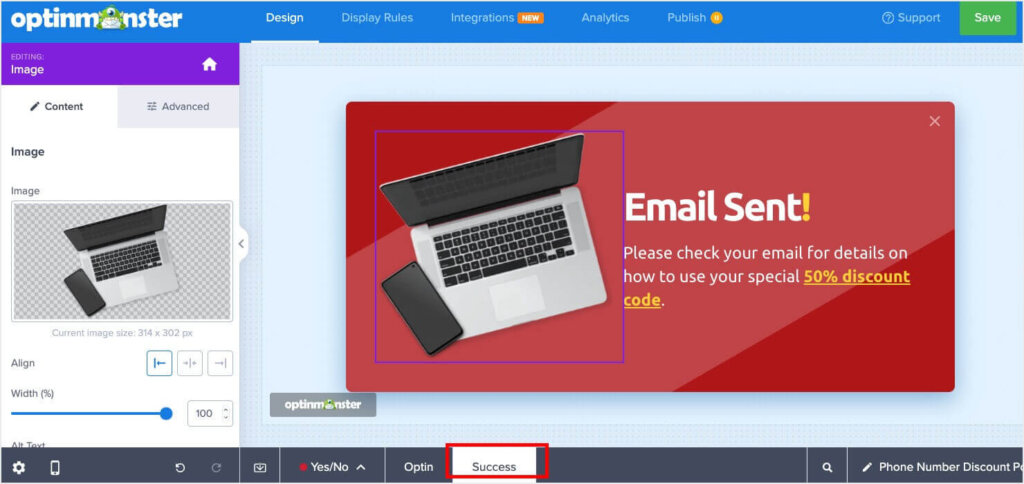

Then, just follow the same steps as before to edit the image and text.

Step 3: Set Your Display Rules
Next, you’ll need to decide where and when you want to display your campaign.
OptinMonster offers several ways to display your campaigns. Our targeting rules are designed to show the right offer to the right person at the right time.
Our targeting rules let you display campaigns based on:
We’re going to keep it simple for our phone number popup and focus on Exit-Intent®. Our popup will show up anytime a visitor starts to exit our website.
Click the Display Rules tab at the top of the screen.


By default, you’ll see 2 display rules:
- Time on page is at least 5 seconds
- Current URL path is any page


We’ll leave #2 as is, but we’re going to edit the first rule.
Click the dropdown arrow beside time on page. Then select Exit Intent®.


You’ll be able to select the level of sensitivity for the exit intention, and I’m going to leave mine at Medium.
With your campaign designed and your display rules now set, click Save.


Step 4: Integrating With an SMS Marketing Tool
Before you publish your campaign, you’ll need to integrate OptinMonster with the platform you use for email and SMS marketing.
Select the Integrations tab at the top of the screen and then click Add a New Integration.


Then, search for your software, select it, and follow the integration instructions.
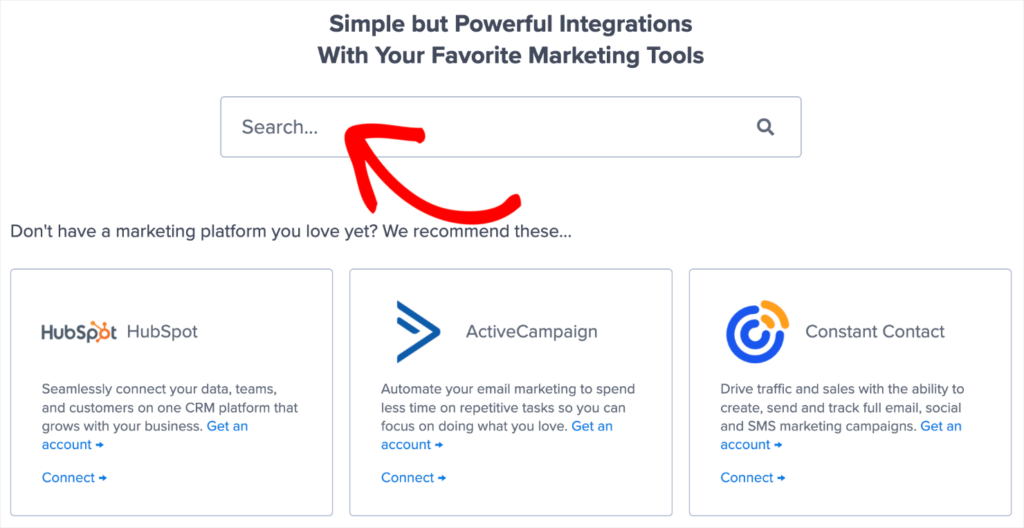

You’ll need the API key from your email and SMS platform in order to complete your integration.
Save your campaign.
Step 5. Publish Your Phone Number Popup Campaign
All that you need to do now is Publish your campaign.
Click the Publish tab at the top of the page. Under Publish Status, select Publish.


That’s it! You’re on your way to collecting phone numbers using a popup on your website.
For more practical strategies to build your subscriber list, we recommend checking out the following articles:
Ready to create popups to get more subscribers for your SMS and email marketing? Get your OptinMonster account today.
Disclosure: Our content is reader-supported. This means if you click on some of our links, then we may earn a commission. We only recommend products that we believe will add value to our readers.


